My Paper Airplane Balancing Fixture
Just what is a Paper Airplane Balancing Fixture? If your project requires that you be able to find the Center Of Gravity (CG), also called the balance point; then, you need a method to accomplish this. There are many ways, designs, and materials to accomplish this. Some will look more professional in a serious science fair competition, while others are geared toward "The science fair is Monday, and I haven't started!" situations.
Safety Warning: The instructions on this (and other projects pages) show the use of: sharp knives, saws, other tools, and even potentially harmful glues; requiring experienced use and knowledge of how to safely use them. Since I have such a wide range of readers in age and experience I feel the need to add this warning. If you do not have any experience with how to safely use any of these tools get help! There are always alternate ways to accomplish the task. Scissors used instead of knives, etc. The point is to stay safe and have fun! This projects suggest using a hot glue gun. Hot glue is not as commonly used as it was in the past due to safety concerns from burns. Other methods include any "gap feeling" glue that will bond to the plastic rulers and cardboard. One example is super glue (gel type). These glues all have risk of injury and gloves should be used. You should even test the gloves to make sure the wet glue won't eat straight through the glove. Again. I strongly advise getting help from someone with experience if you are not experienced with the glue you plan to use.


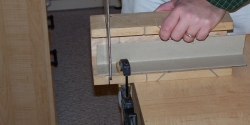
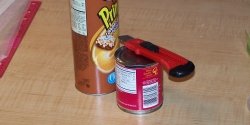
1. If you can find the material shown in the picture it can be used for a variety of projects including our paper
airplane balancing fixture. This material is used for shipping items in boxes or as protection on pallets when
using steel bands. Check with any adults who may work in a factory or shipping industry to see if you can get
some pieces. If you can't get this material then click here for other
options to make the fixture.
2. Notice that the inner edge of this angle stock is higher than the outer edge. We can use this material feature
to help balance our paper airplane while we find its Center of Gravity.
3. Cut a section of the angle about 6" long.
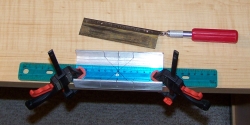
4.Cut a plastic ruler into sections about 3" in length.
5. Mark the center of the angle and then add marks about 3/16" on each side of the center.
6. Clamp two of the ruler sections to the outer edge of the angle. Make sure that the top of the ruler sections
is lined up with the inner edge of the angle. You can use a block of wood or straight edge to verify the
alignment. The ruler sections should also be spaced even with the off center marks made in the previous step.
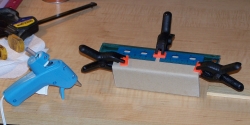
7. Glue the ruler sections to the angle. Hot glue works good here. Note: hot glue guns are not found in as many homes as it used to be. An alternate glue can be gel style super glue. I STRONGLY recommend gloves if you use this material. Just test a sample part of the glove material with a drop to make sure the glue won't dissolve the material. Several "gap filling" modern glues are available that will work.
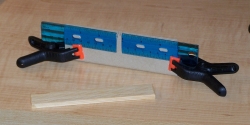
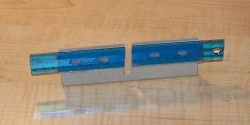
8. Cut out the material between each ruler section to allow the fuselage of the paper airplane clearance when
find the C.G.
9. The finished project. You can now use the paper airplane balancing fixture to quickly find a paper airplane's
center of gravity. For instructions on how to use click here
The Instructions for Making a Paper Airplane Balancing Fixture From Round Stock
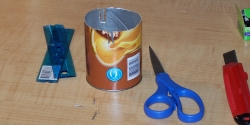
To make a fixture from a card board tube: Special Note: The pictures do not show a very neat job because I was
trying to see how fast I could make one (for those who do not want a neat job and waited to the last minute). I
was able to make a fixture in under two minutes as long as the glue gun is already hot. However, you can do a
very neat job using only tubes from food or paper rolls by following steps 5 & 6.
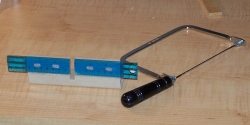
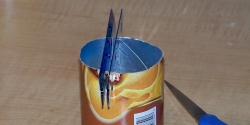
1. Cut the tube to the desired height. I have shown a way you can get a good cut with a sharp knife and a little
practice. Just press very lightly and score around the tube several times until it cuts through.
2. Mark and cut slots for 6" rulers.
3. Place rulers in slots and hot glue.
Using the round tube paper airplane balancing fixture:
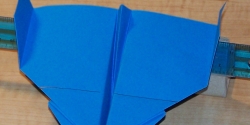
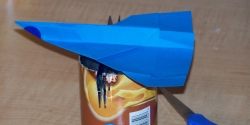
4. Place paper airplane up side down on fixture as shown (tail and fins may have to be unfolded). Move the
airplane back and forth until you find the point that the paper airplane just starts to tilt forward. Mark the
balancing line.
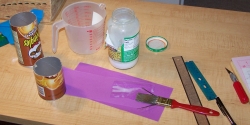
5. Round tubing from food or from paper rolls can be used neatly if a few more layers of paper are wrapped around
to add a bit more strength and improve the look. Make a mixture of one half white glue and one half water. Paint
this mixture on to strips of paper to wrap around tube. Wrap glue coated strips tightly around tube.
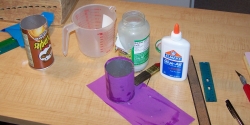
6. The outside of the tube can be painted with the glue and water mixture to give a more consistent appearance.
Wipe off excess mixture and let dry. This same new tubing can be used for project three A
Paper Airplane Display Base.
Using the paper airplane balancing fixture:
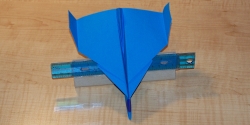
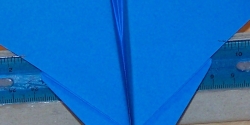
1. Place paper airplane on fixture as shown. Move the airplane back and forth until you find the point that the
paper airplane just starts to tilt forward.
2. Mark the position of the ruler right at the front balance point on the paper airplane's wings.
3. Now move the plane toward the back until it starts to tilt backward.
4. Mark the position of the ruler right at the rear balance point on the paper airplane's wings. The actual CG will be between these lines.
